Table of Contents
Bulk Actions
Bulk Actions apply actions across many studies at once and are difficult to undo. Bulk actions are automatically executed on all studies shown on Study Inspector based on the filters applied, and once executed, may only be undone by further bulk actions or individual study actions (there is no universal 'undo' button for all executed bulk actions). Therefore, before executing a bulk action, double-check that you have filtered to the studies of interest and appropriately selected the bulk action of interest.
1. Filter to Studies of Interest
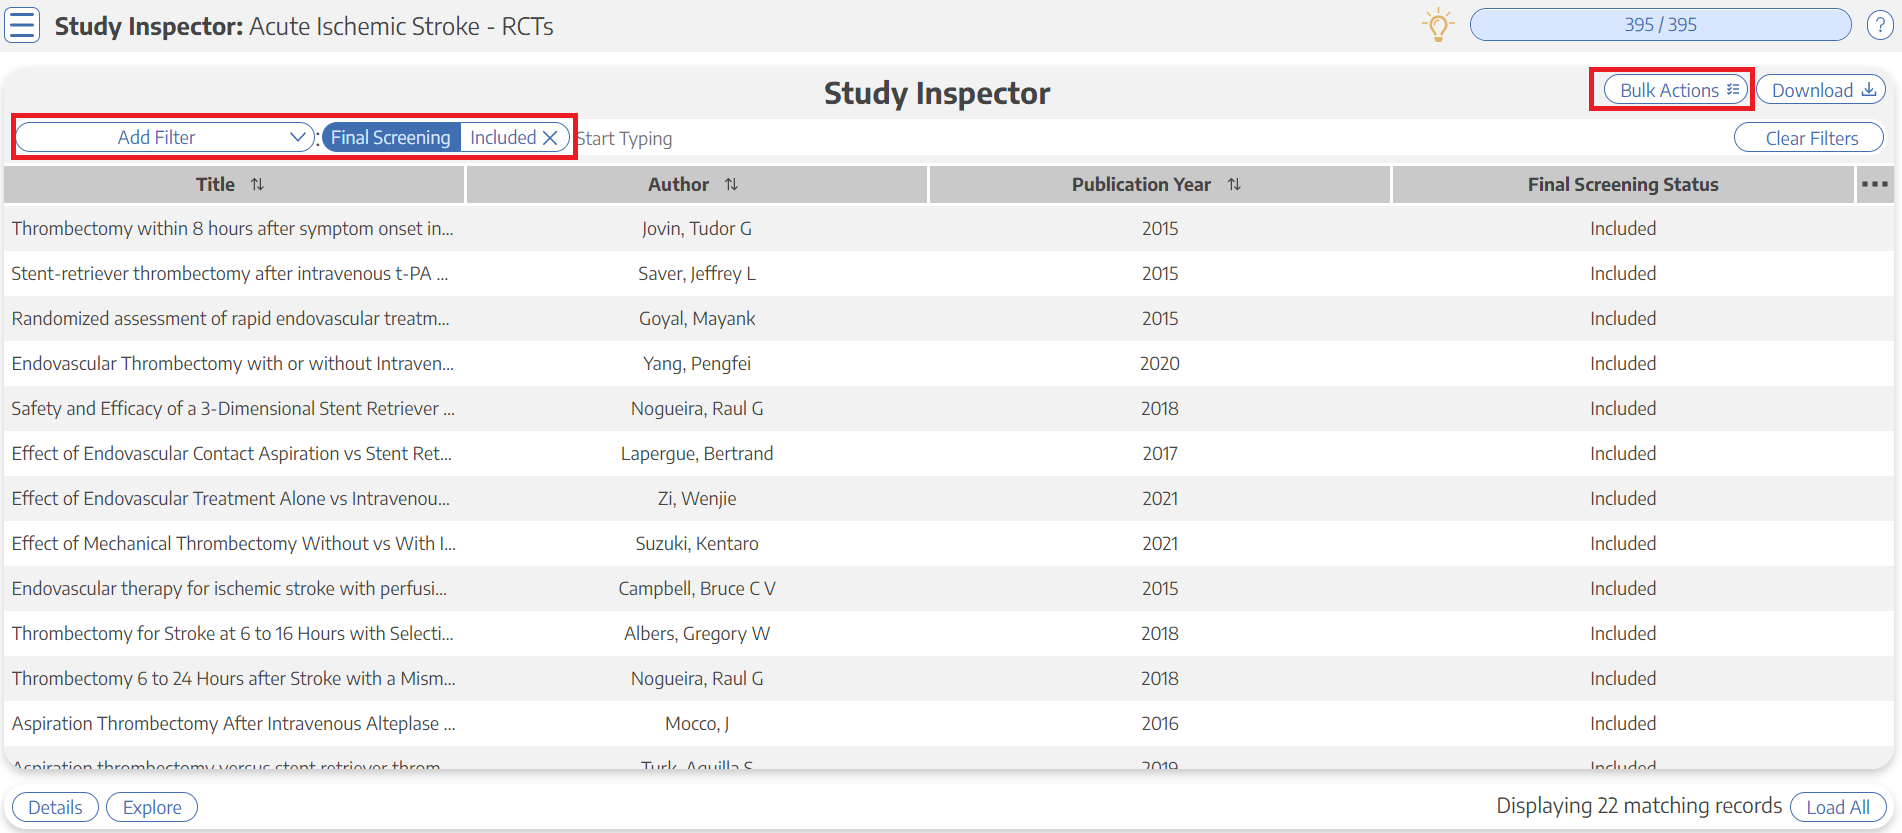
Using the filter options on Study Inspector, apply a series of filters that identifies all studies on which you want to execute a bulk action. For example, filtering by Screening Status: Included in the nest shown below winnows 395 total studies to 22 studies that match the filter.
2. Open Bulk Actions
Once you have filtered to the set of studies to which you want to apply a Bulk Action, click “Bulk Action.” This will open the Bulk Actions Modal, from which you can execute Bulk Actions.
3. Execute Bulk Actions
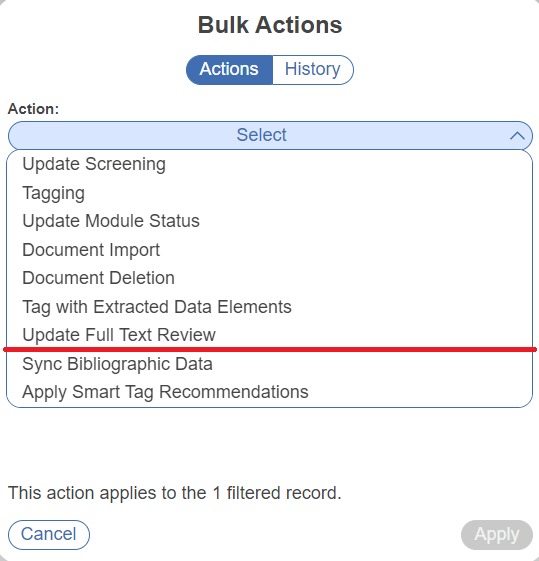
From the Bulk Actions Modal, you can:
- Document Import via unpaywall or upload from your device,
Enterprise Users Only (listed below red line in screenshot):
Bulk Screening Status:
To change screening status in bulk, select Update Screening in the Bulk Actions Modal. Depending on your access in the nest, admin or otherwise, you can edit your decisions and/or final decisions. Depending on your screening mode configured, Dual and/or Two pass, you can edit Abstract and/or Full text screening. Update the Screening Status to Included, Excluded, or Unscreened; if you select Excluded, you must also select an Exclusion Reason to apply across these studies.
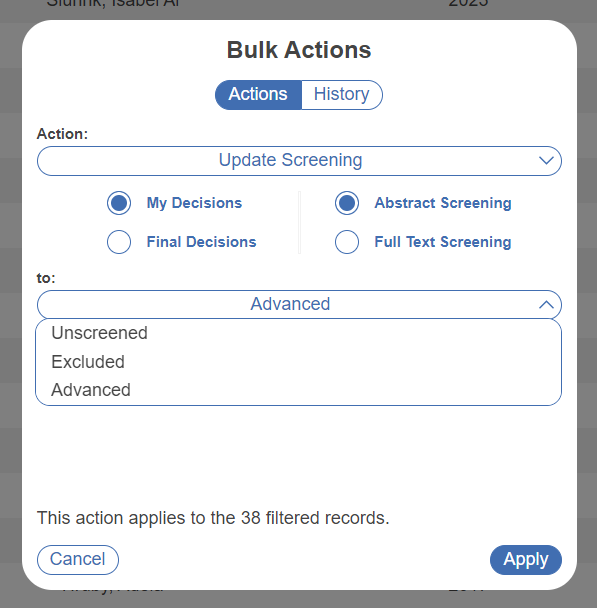
You can change either 1) the final screening decisions that are a result of complete adjudication after dual screening, or 2) you can just change your own reviewer-level screening decisions. To change final screening decisions instead of your own reviewer-level screening decisions, select Final Decisions as shown above.
Bulk Tagging:
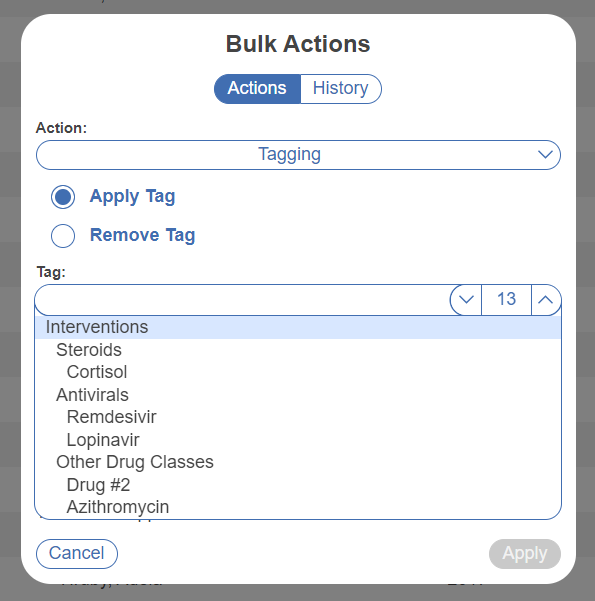
To add or remove tags in bulk, use the drop-down in the Bulk Actions Modal and select Tagging. Select either Add or Remove, and select the tag of interest from the tag drop-down.
Bulk Module Status:
To change the status of studies with respect to Tagging, MA Extraction and/or Critical Appraisal, select Update Module Status in the Bulk Actions Modal. Select either Tagging, MA Extraction, or Critical Appraisal, and change the status to either Complete or Incomplete. This will not alter the tags on any study or the data extracted on any study, but will instead change whether these studies are presented in the relevant sequential queue.
Bulk Document import:
To import full text PDFs in bulk, select Document Import in the Bulk Actions Modal. You will have two options: Import from Unpaywall (for Open Access articles) or Upload from your Device (for full texts or supplements you have downloaded). Please note: we do not offer bulk import directly from Article Galaxy.
Bulk Import from Unpaywall
To import Open Access articles, once you have selected Full-Text Import, from the next drop-down, select “Import from Unpaywall”.
This will automatically upload the full-texts through services such as Unpaywall. Click “Apply.”
Only PDFs of studies to which the service in question has access to will be imported (in general, all Open Access articles should be available); the modal will note how many studies for which full texts were available.
Bulk Upload from your Device
To Bulk Upload from your device and auto-match PDFs to records based on Title and DOI, select “Upload from your Device” in the drop-down:
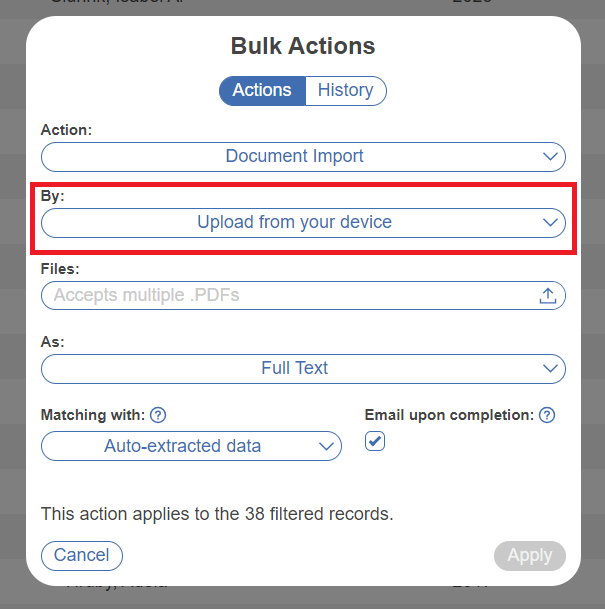
Then, either click into the next field (labelled “From:”) to identify multiple PDFs from your local drive; alternatively, drag and drop the appropriate PDFs into the field. Select in the next dropdown whether the uploaded pdfs are the records' full texts or supplements.
Decide how the uploaded documents are matched:
- Via Auto-Extracted Data - This refers to document-record matching that is completed automatically by the software based on Title and DOI within the PDF (without any need to match PDF names against records in the nest).
- Via Ref ID - This refers to document-record matching that occurs using the record's Ref ID. Ref ID is the number assigned to a record based on when they were imported into the nest. e.g. Ref ID = 1 would be the first record in the nest, 2 would be the second, and so on. If you upload via Ref ID, the PDFs you upload MUST have Ref IDs in their file names that match the records they should be attached to.
- Via External ID - This refers to document-record matching using the record's external ID. This is externally assigned, and for successful import each document must contain only the number as the identifier.
You can also check whether you would like to receive an email upon document import completion then hit Apply. The files will then be auto-matched against the records in your nest; if any PDFs fail to match, the email will note how many and which PDFs did not match.
Bulk Document Deletion
If you wish to bulk delete Full Texts and/or Supplements associated with the filtered records you can do so using this option. Select Document Deletion and specify Document Type and hit Apply.
Bulk Apply Tags from Data Elements
This Bulk Action is meant to apply tags whenever a data element is gathered, but the tag it is paired with was not applied to the stud(ies) in question.
To bulk-apply all tags that correspond to extracted data (where the data element is present but the tag was not applied), simply select Tag with Extracted Elements. Then, click “Apply.”
This will not overwrite any tags that were already present on any study.
Warning: while this Bulk Action will back-propagate all data elements, this may mean that manual re-review of tagging is warranted, and no text will be associated with the back-propagated tags, possibly limiting the interpretations that these tags enable.
Bulk Apply Tags Full-Text Review Status
This bulk action will change the status of full-text review on the selected group of articles. You can change the full-text review status to be “Reviewed” or “Not Reviewed.”
To execute this bulk action, select “Update Full-Text Review” from the drop-down menu, then select whether you want the selected studied to be marked as “Full-Text Reviewed” or “Not Reviewed.” Then, click “Apply.”
Bulk Sync Bibliographic Data
If for any reason, the bibliographic data of a group of records needs updating, you can use this bulk action to update the data based on the information available on PubMed or CrossRef. This overwrites the existing data if they do not match.
To execute this bulk action, filter to the studies that require updating, select “Sync Bibliographic Data” and click “Apply.”
Enterprise-Level Bulk Actions
Bulk Alter Study Allocation
If you have Allocation toggled on in Settings, you can use this action to allocate specific modules in the filtered records to users of choice using this tool.
Bulk Apply Smart Tag Recommendations
If you have generated Smart Tag Recommendations in Settings, you can use this single action to apply all the tags that were recommended.