Table of Contents
Configure Tags in Standard Mode
Standard Tagging mode allows you to configure concepts to be extracted via a list of dropdown tags. The tag hierarchy you configure will display the most general concepts at the top (root tags) with more specific concepts beneath (child tags) and this will be replicated in the dropdown list in the Tagging module.
See here for further instructions on applying tags in Standard Tagging mode.
Navigate to Settings and turn on Standard Mode
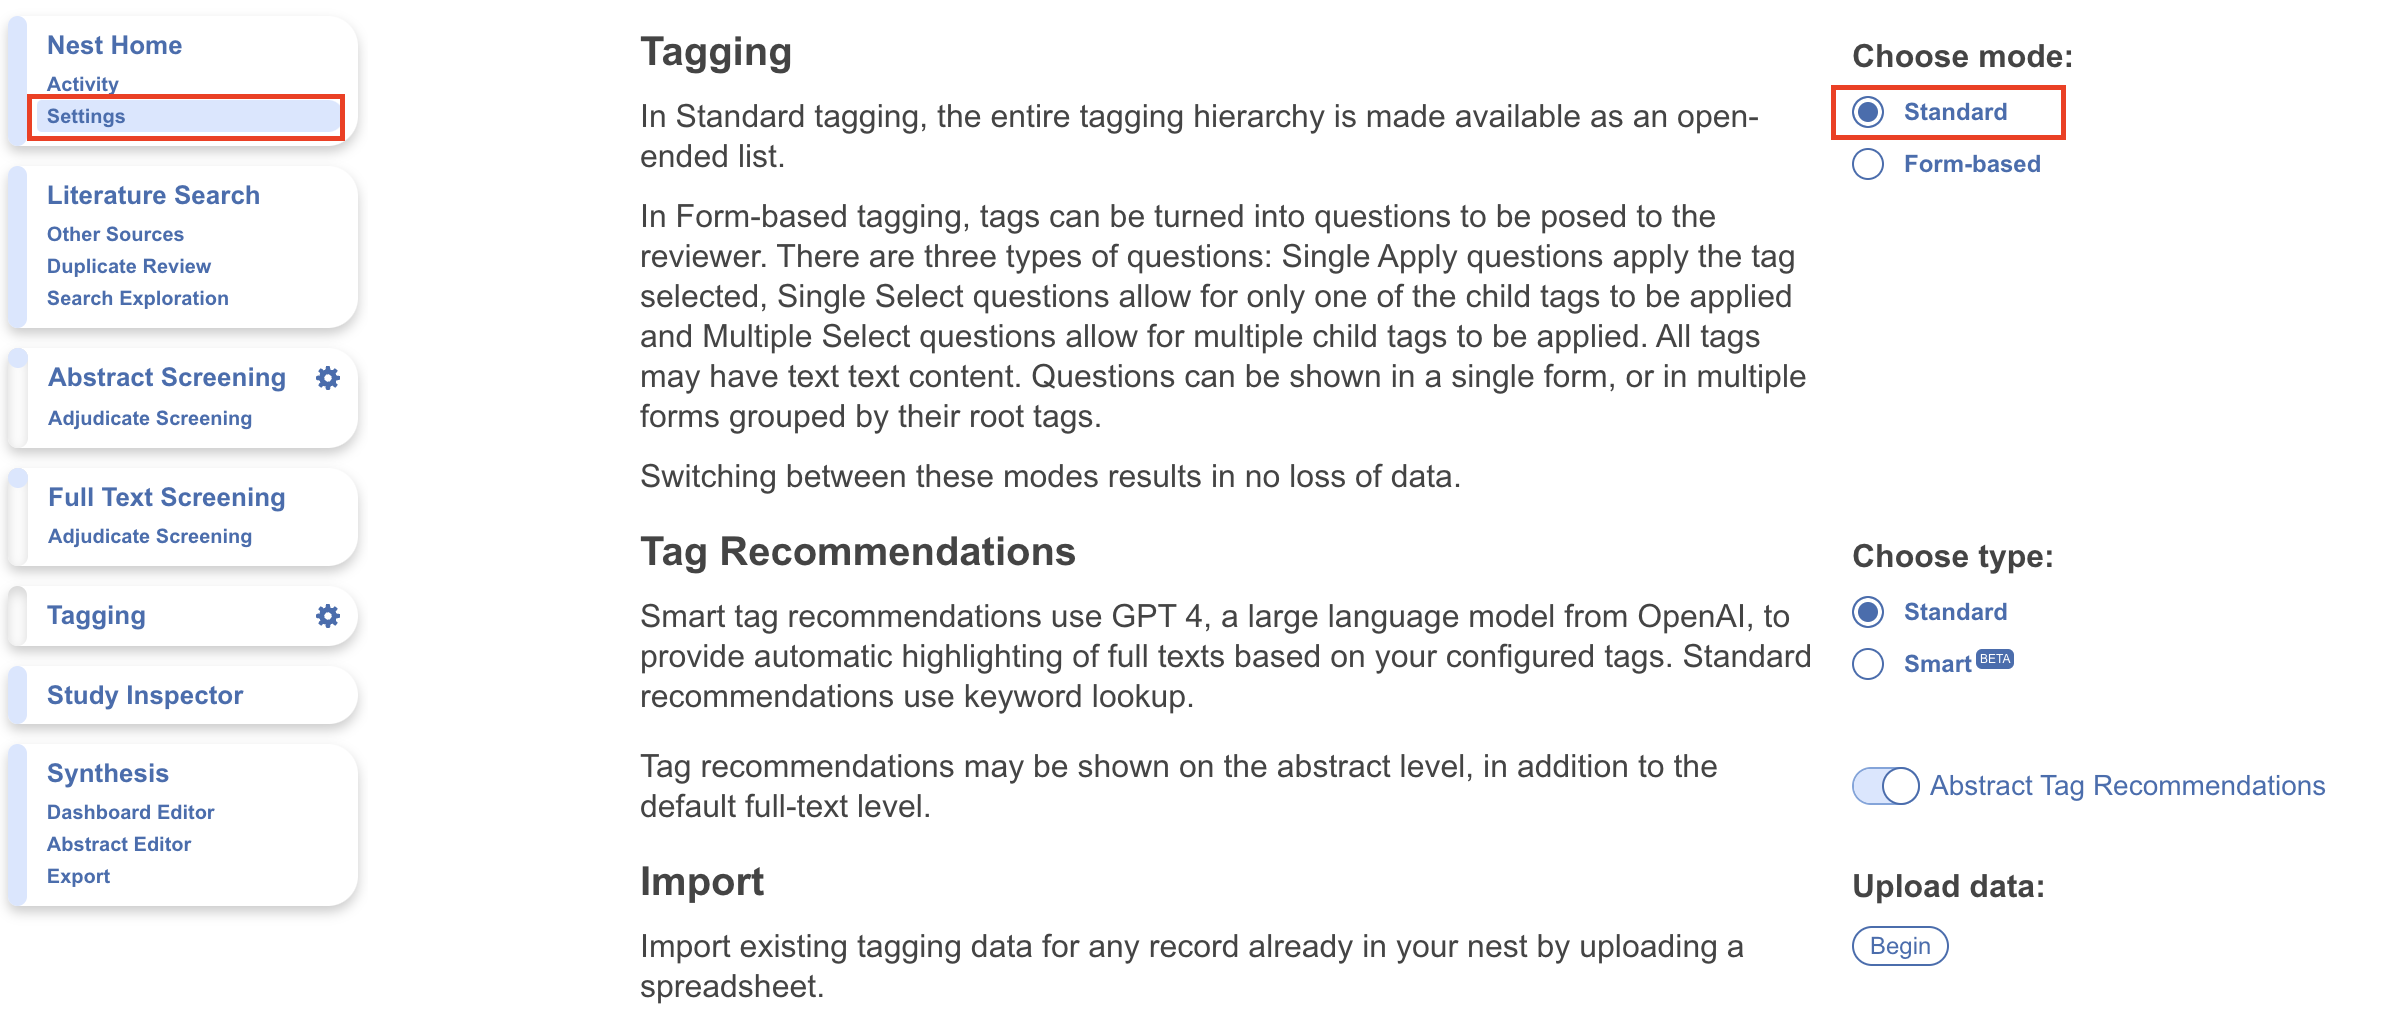
Note: switching between modes results in no loss of data.
Configuring Study Tags
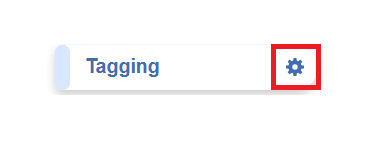
1. Navigate to Configure Study Tags
Click on the gears icon in the Tagging tab:
This will bring you to the Tag Hierarchy, which will be blank until you have added tags.
2. Create Root Tags
Root Tags are the highest level of the hierarchy, and have no parent tags. These should represent the most general categories of qualitative evidence you are gathering. For example, you could create Root Tags representing the patient population, intervention, comparison group, and outcomes (PICO) or similar, and add in any other concepts of interest (such as Study Design).
To create a new Root Tag, make sure you're in edit mode (pencil icon), click the blue tag icon in the middle, and a new root tag will appear beneath the rest or you can drag and drop the same blue tag icon to place a tag in your desired position. Tag position can be altered any time by selecting, dragging and dropping the tag. The right hand side will display the tag's details you should fill in.

Alternatively, if the pencil icon is toggled, you have the option to quickly create a tag by inputting its name and hitting Enter on the keyboard, and coming back to edit details later on.
Then, name the tag and add a Description to give details to your team on what a tag represents and/or an alias (both optional).
You are now ready to build your hierarchy out from your Root Tags by creating “Child Tags”. Tags should get more specific as they proceed deeper into the hierarchy.
By default, the “left-to-right” configuration is presented (pink) to best display tag names. If you prefer “top-to-bottom” configuration, select the hierarchy icon above.

3. Create Child Tags
You can build your hierarchy outwards by adding child tags below the Root Tags. To create child tags, drag and drop the new tag icon under your desired parent tag. Input the more specific Tag Name, and add a description if applicable.

Once you have added a child tag, your hierarchy should contain the Root Tag and the tag you created below it. In the above example, Study Design is the root tag, and Randomized Controlled Trial is the child tag. Continue building out child tags until your hierarchy contains a tag for every concept you want to recognize from underlying studies and structure into your Qualitative Synthesis.
Editing the Tag Hierarchy
Making edits to your tag hierarchy is the same for both Standard and Form-based Tagging modes, see here for more on the full functionality of the tag hierarchy.
Recommendations in Hierarchy Building
If you need some assistance in starting your hierarchy, feel free to import one of our public templates.
If you are looking for Best Practices recommendations on what to include in your hierarchy, see here!
From here, you are ready to apply tags in Standard Tagging mode.