Nested Knowledge

Bringing Systematic Review to Life

User Tools

Site Tools


wiki:autolit:admin:allocation

Allocation

Admins can go to the Nest Settings, scroll down to Allocation and click the toggle bar on.

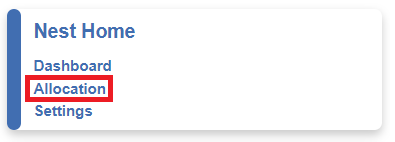
Turning on Allocation will reveal an Allocation page under the Nest Home menu bar where you may allocate records on various criteria.

If you turn on Allocation, you must assign all modules or none, at the moment there is no mix and match of allocated and unallocated modules. As an admin you can assign all user types including yourself and each assigned user will only be able to view records allocated to them (regardless of whether they are an admin). Records unallocated for a particular module will not be presented to any user in that module and must be allocated first.

Instructions on How to Allocate Records

In order to allocate records, records must be present in the nest. So first ensure you add a Literature Search to pull in records to be screened.

You can allocate records for the following modules: Screening, Tagging, Extraction and Critical Appraisal.

This page can be accessed under the Nest Home menu bar or by clicking on any module that has unassigned records will direct you to “Allocation Admin.”

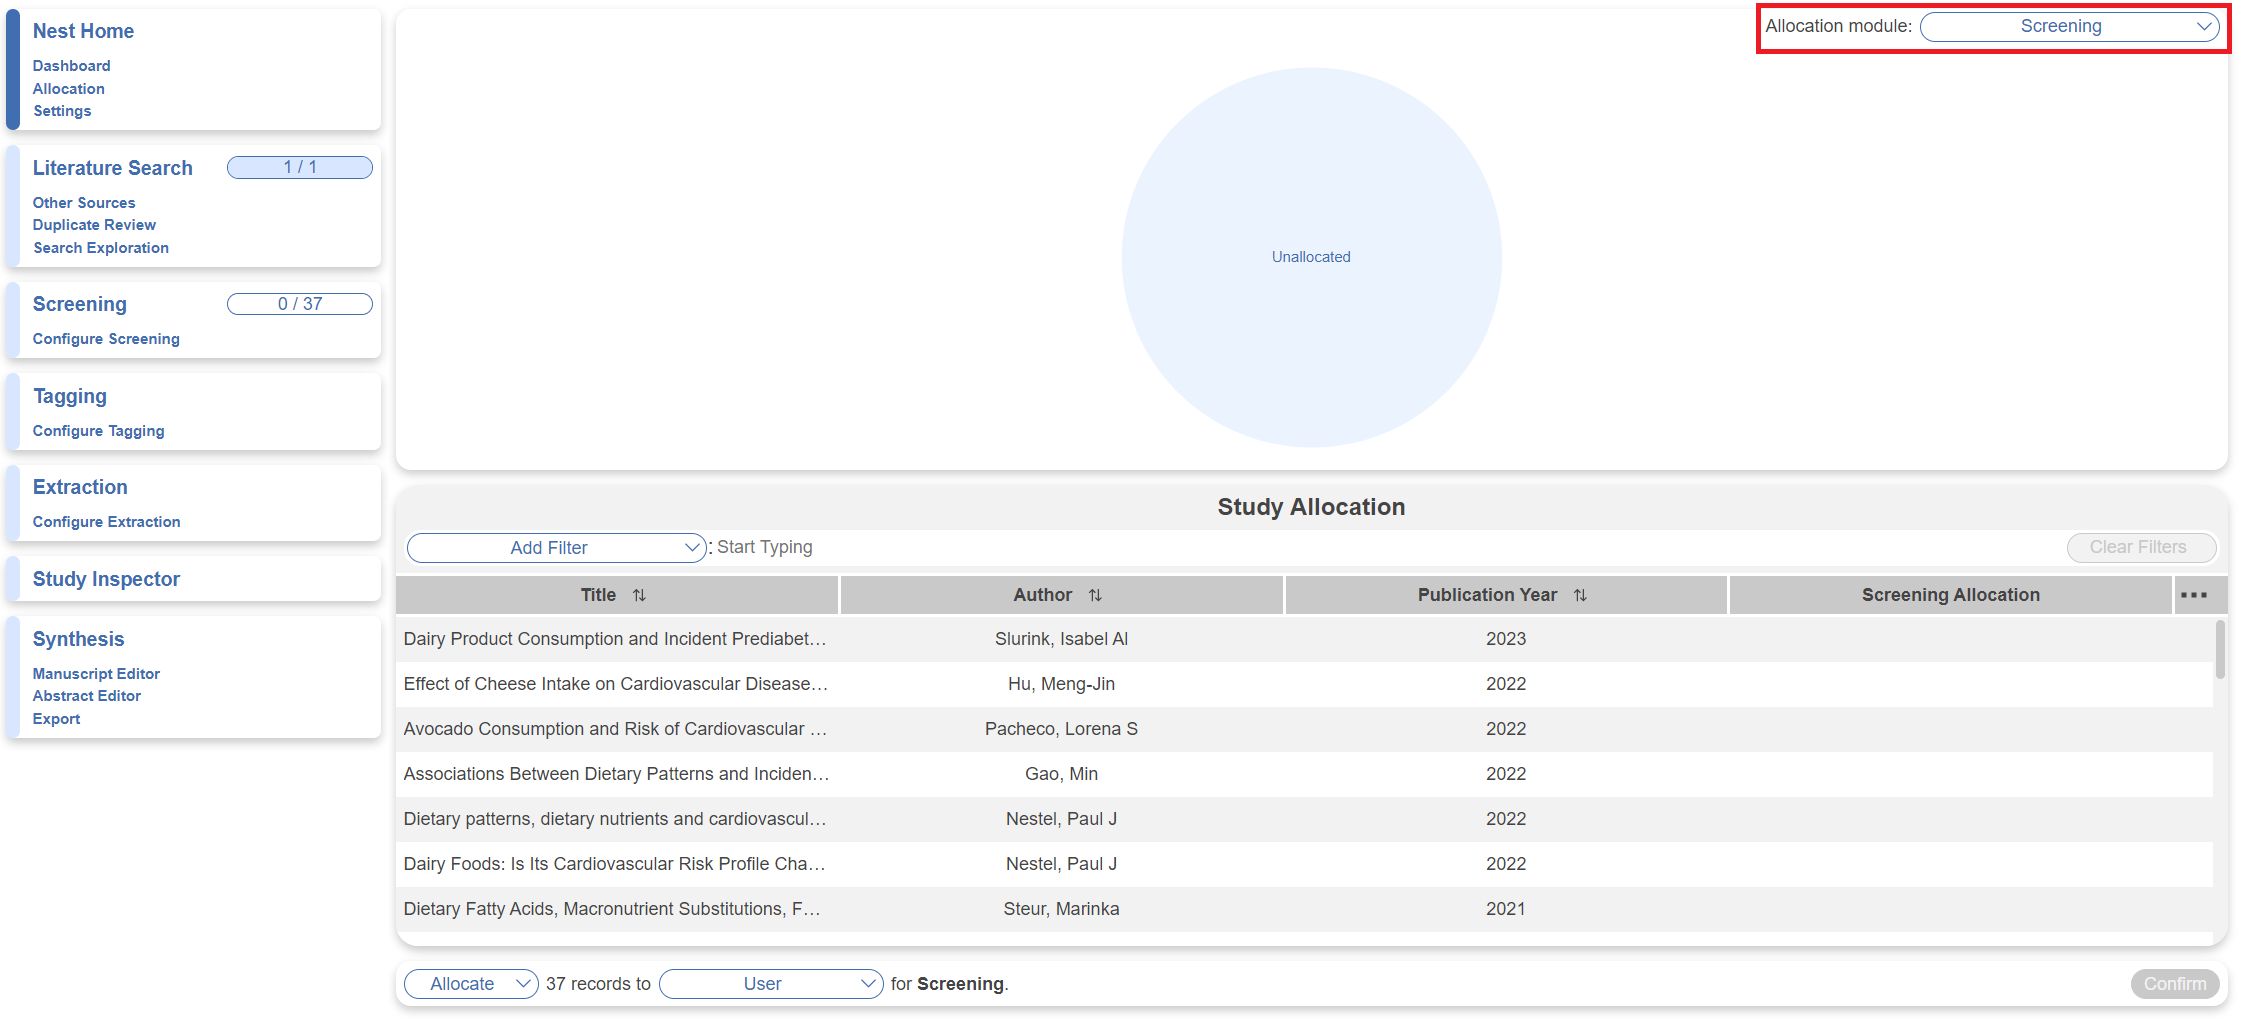
2. Select Allocation module

In the top right dropdown, you can select the module you want to allocate records in. If you have just added a search, you will only be able to add screening allocation at this time since no records have been advanced beyond screening.

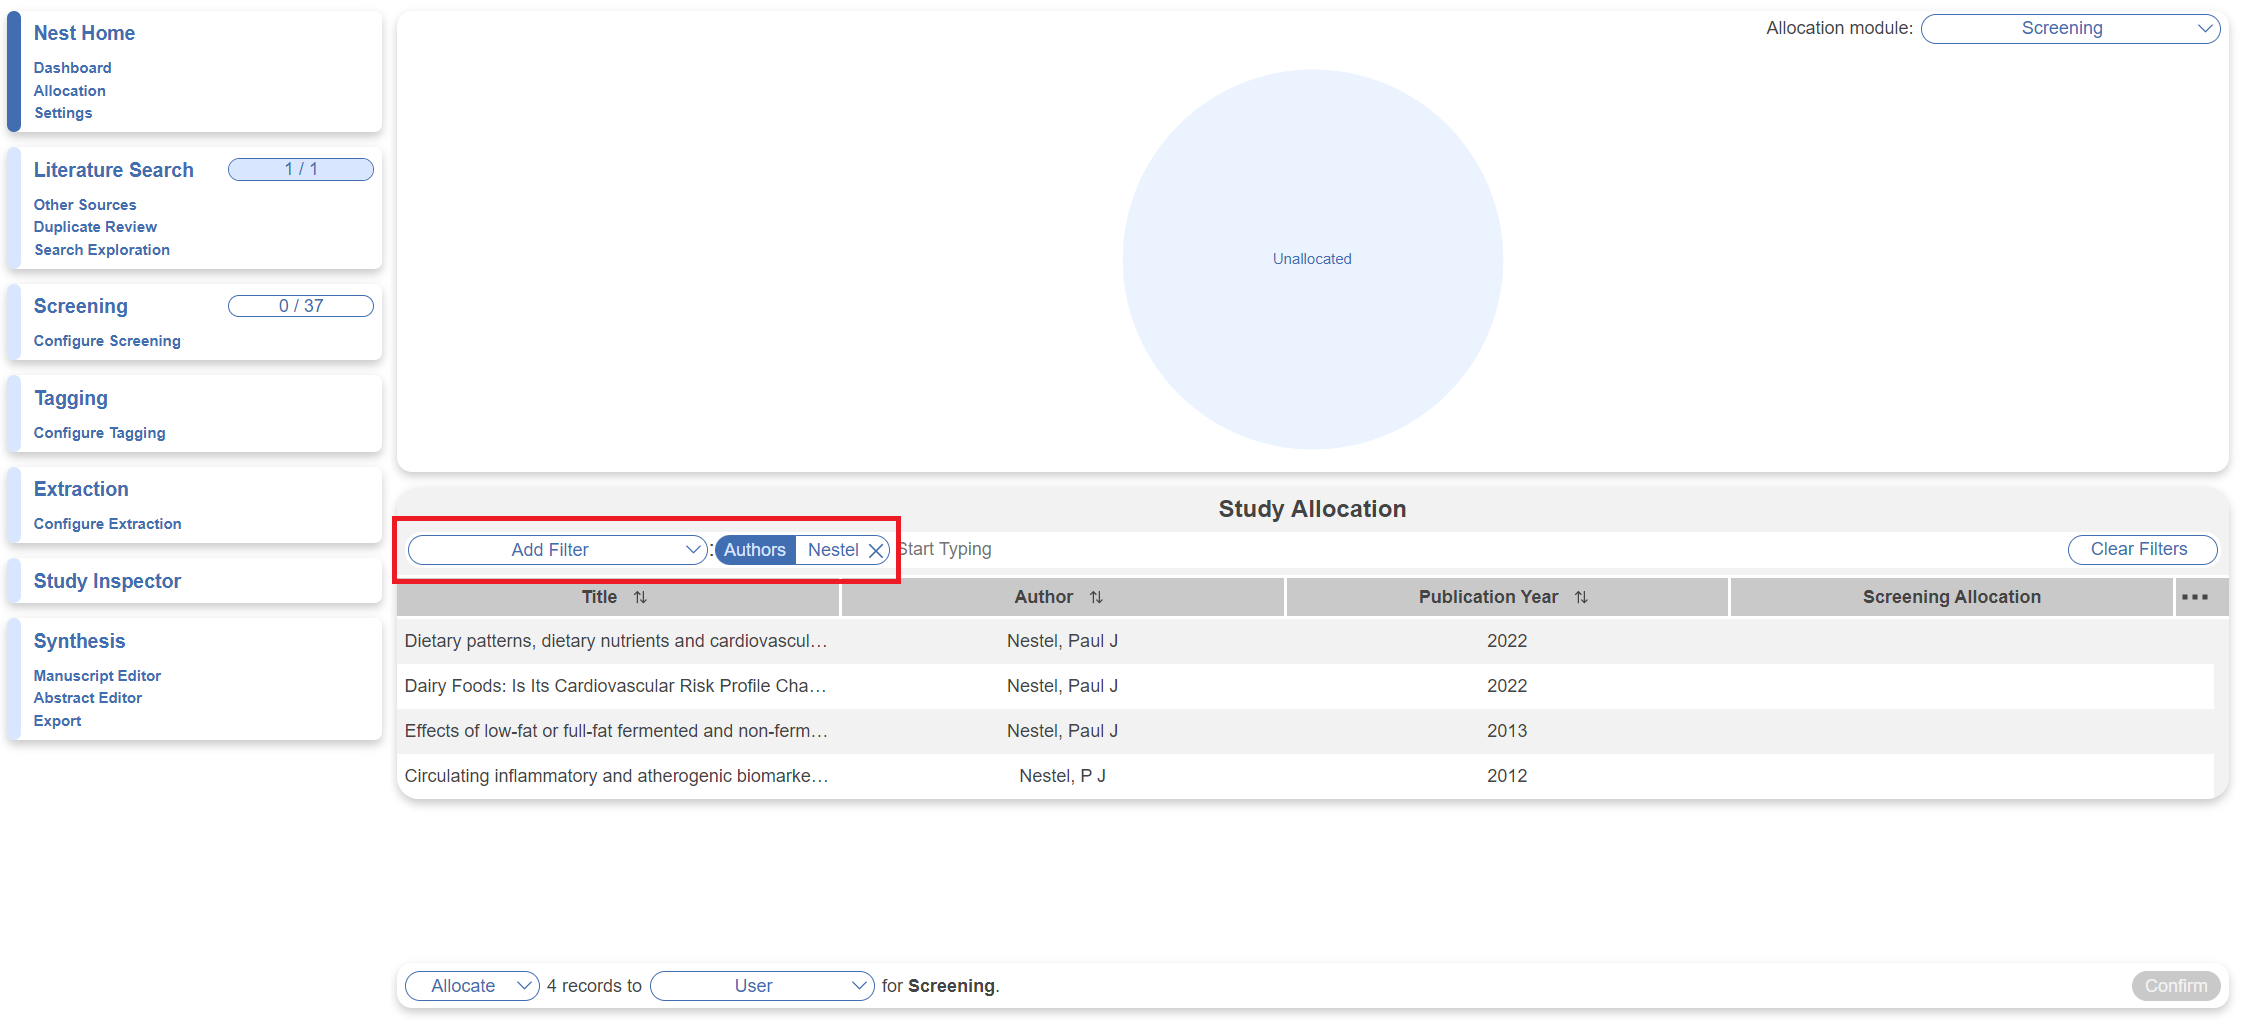
3. Filter to Records to Assign

Add a filter to only assign a specific set of records to a user. These are the same filters that are available to use in Study Inspector. For instance, you can filter by a range of Ref IDs and assign the resulting records to a single user.

This is not necessary if you want to assign all records to one user, you can move straight to the next step.

Note: some filters are automatically added, displayed in grey, and cannot be removed for different allocation modules. This is because they are a necessary filter for studies in that module. For example, only records that have been included in Screening will be displayed in the Tagging allocation module, so a “Final Screening Status: Included” will be displayed.

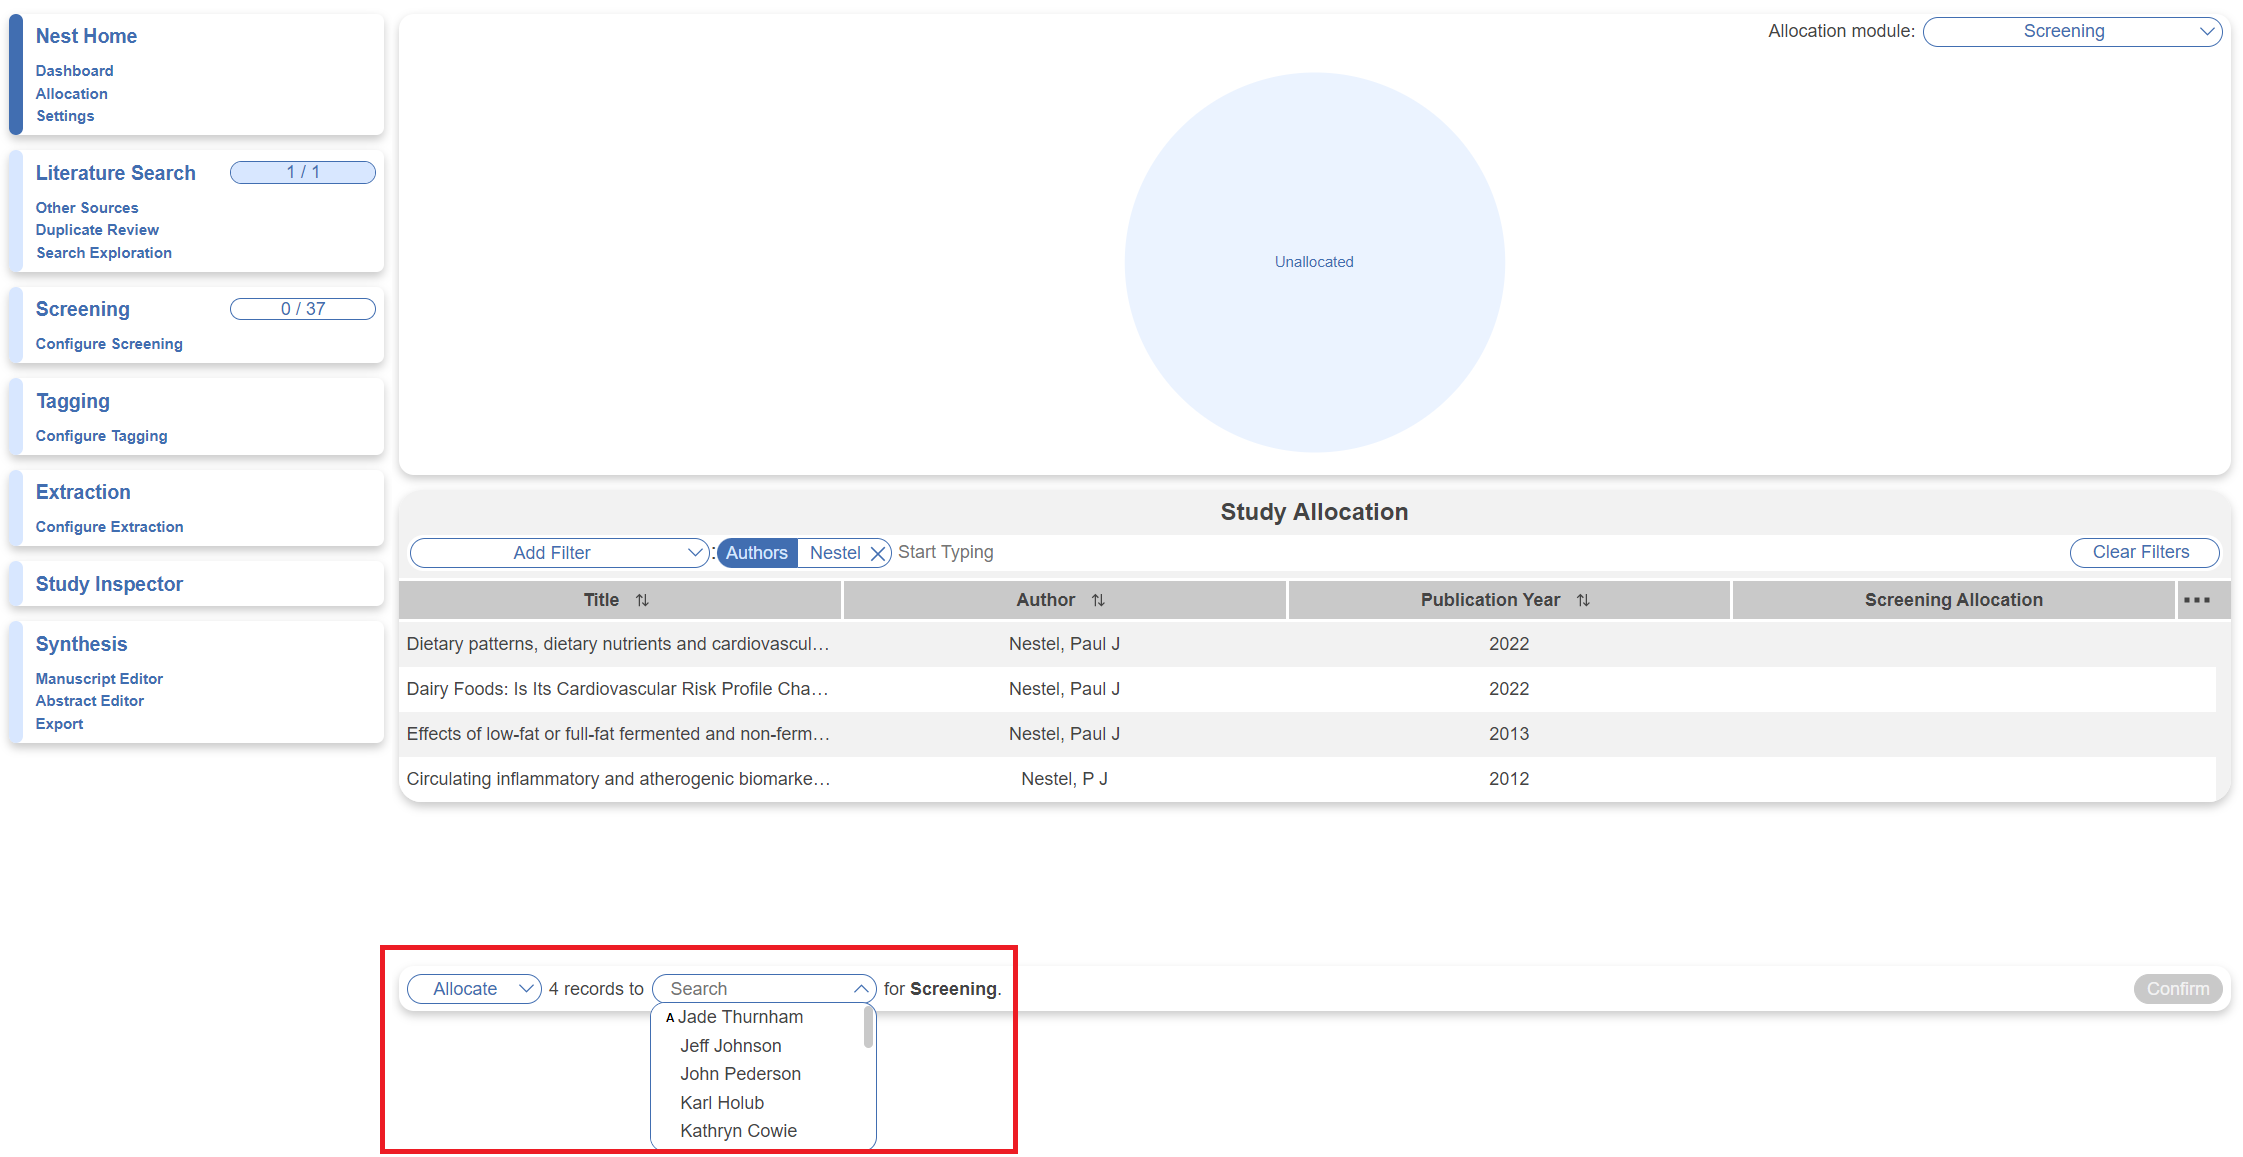
4. Allocate Records to User(s)

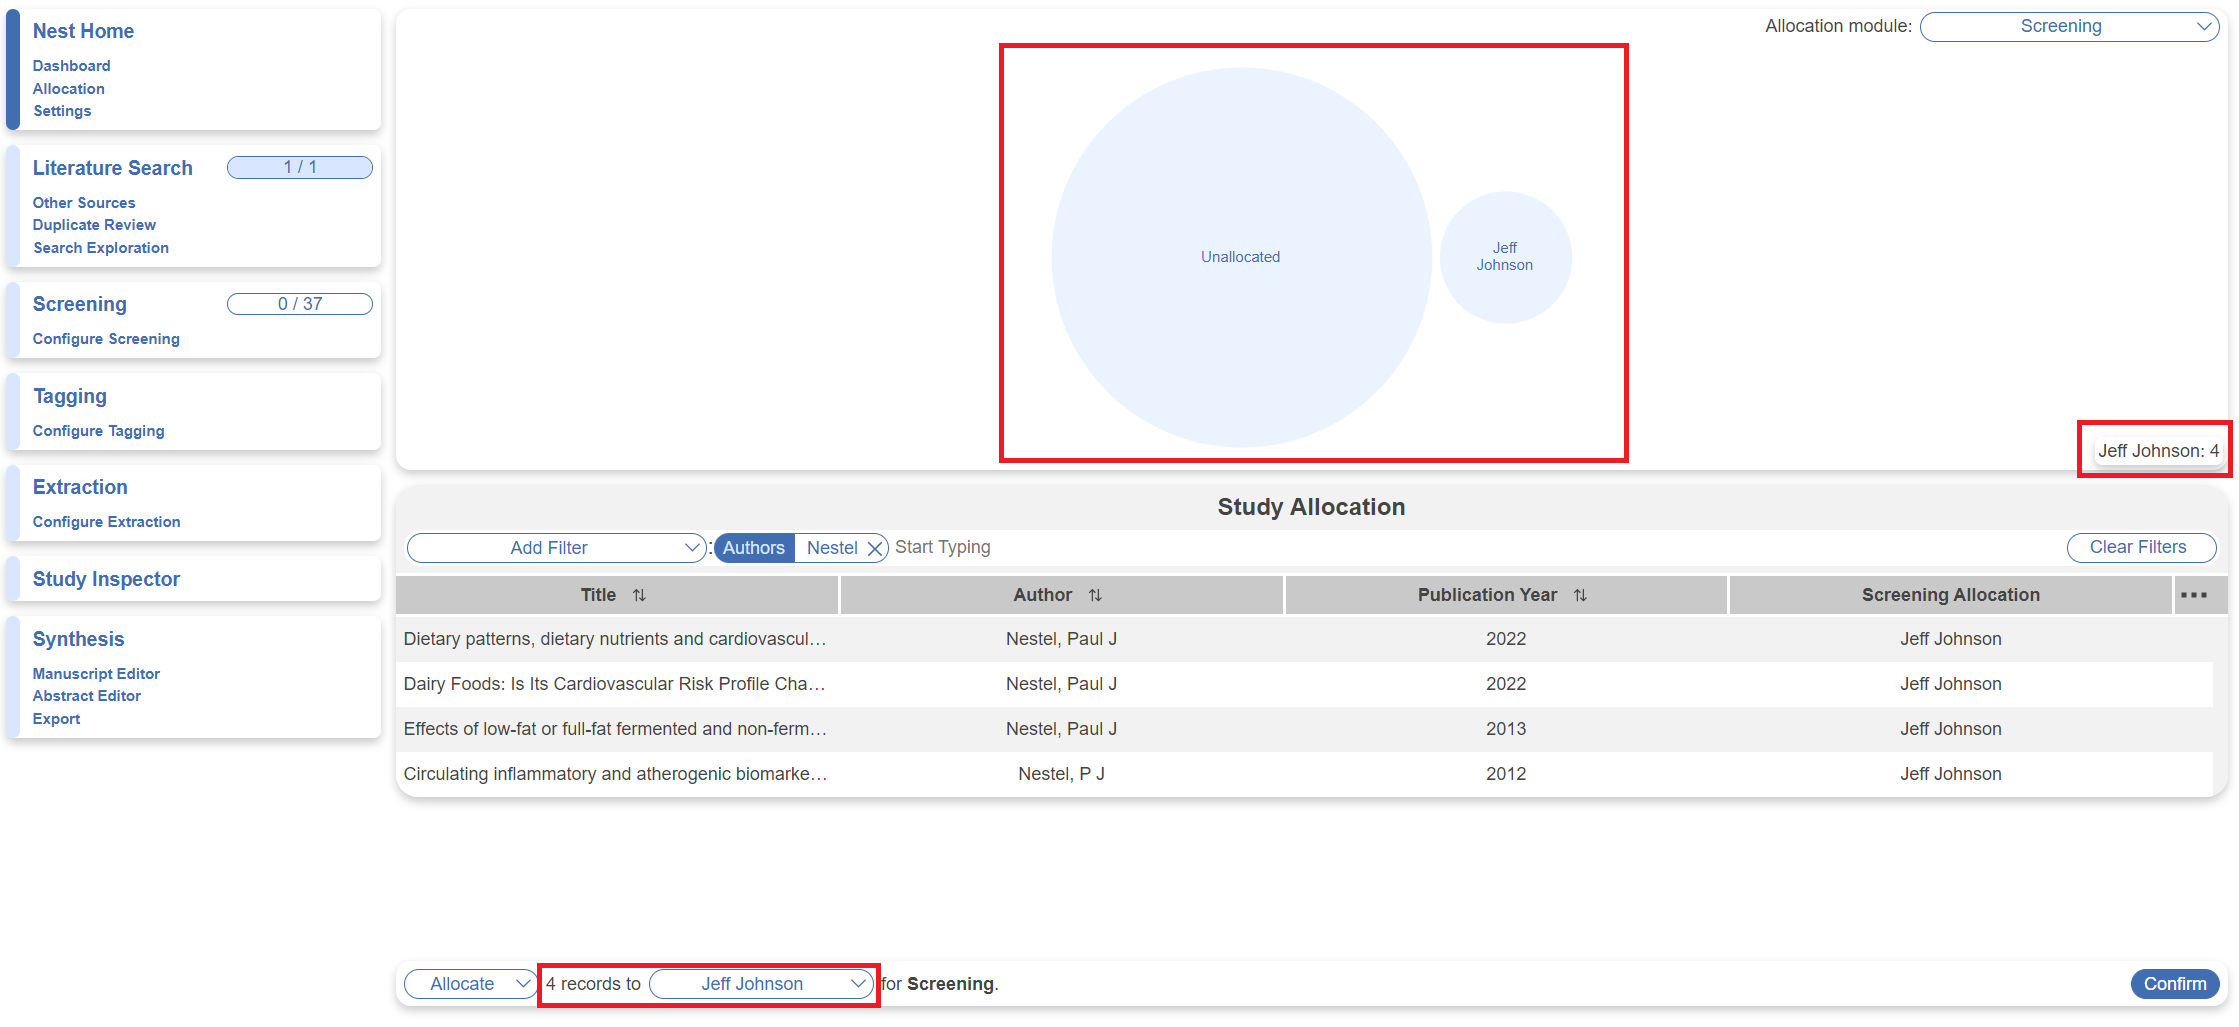
Below, select the user you would like to allocate these records and hit Confirm. Allocated users are not notified in anyway, but only allocated records are displayed to them when they open the nest. In the below example, 4 filtered records out of 37 are being allocated. The A nest to a users name means they are an admin of the nest.

Venn Diagram Explained

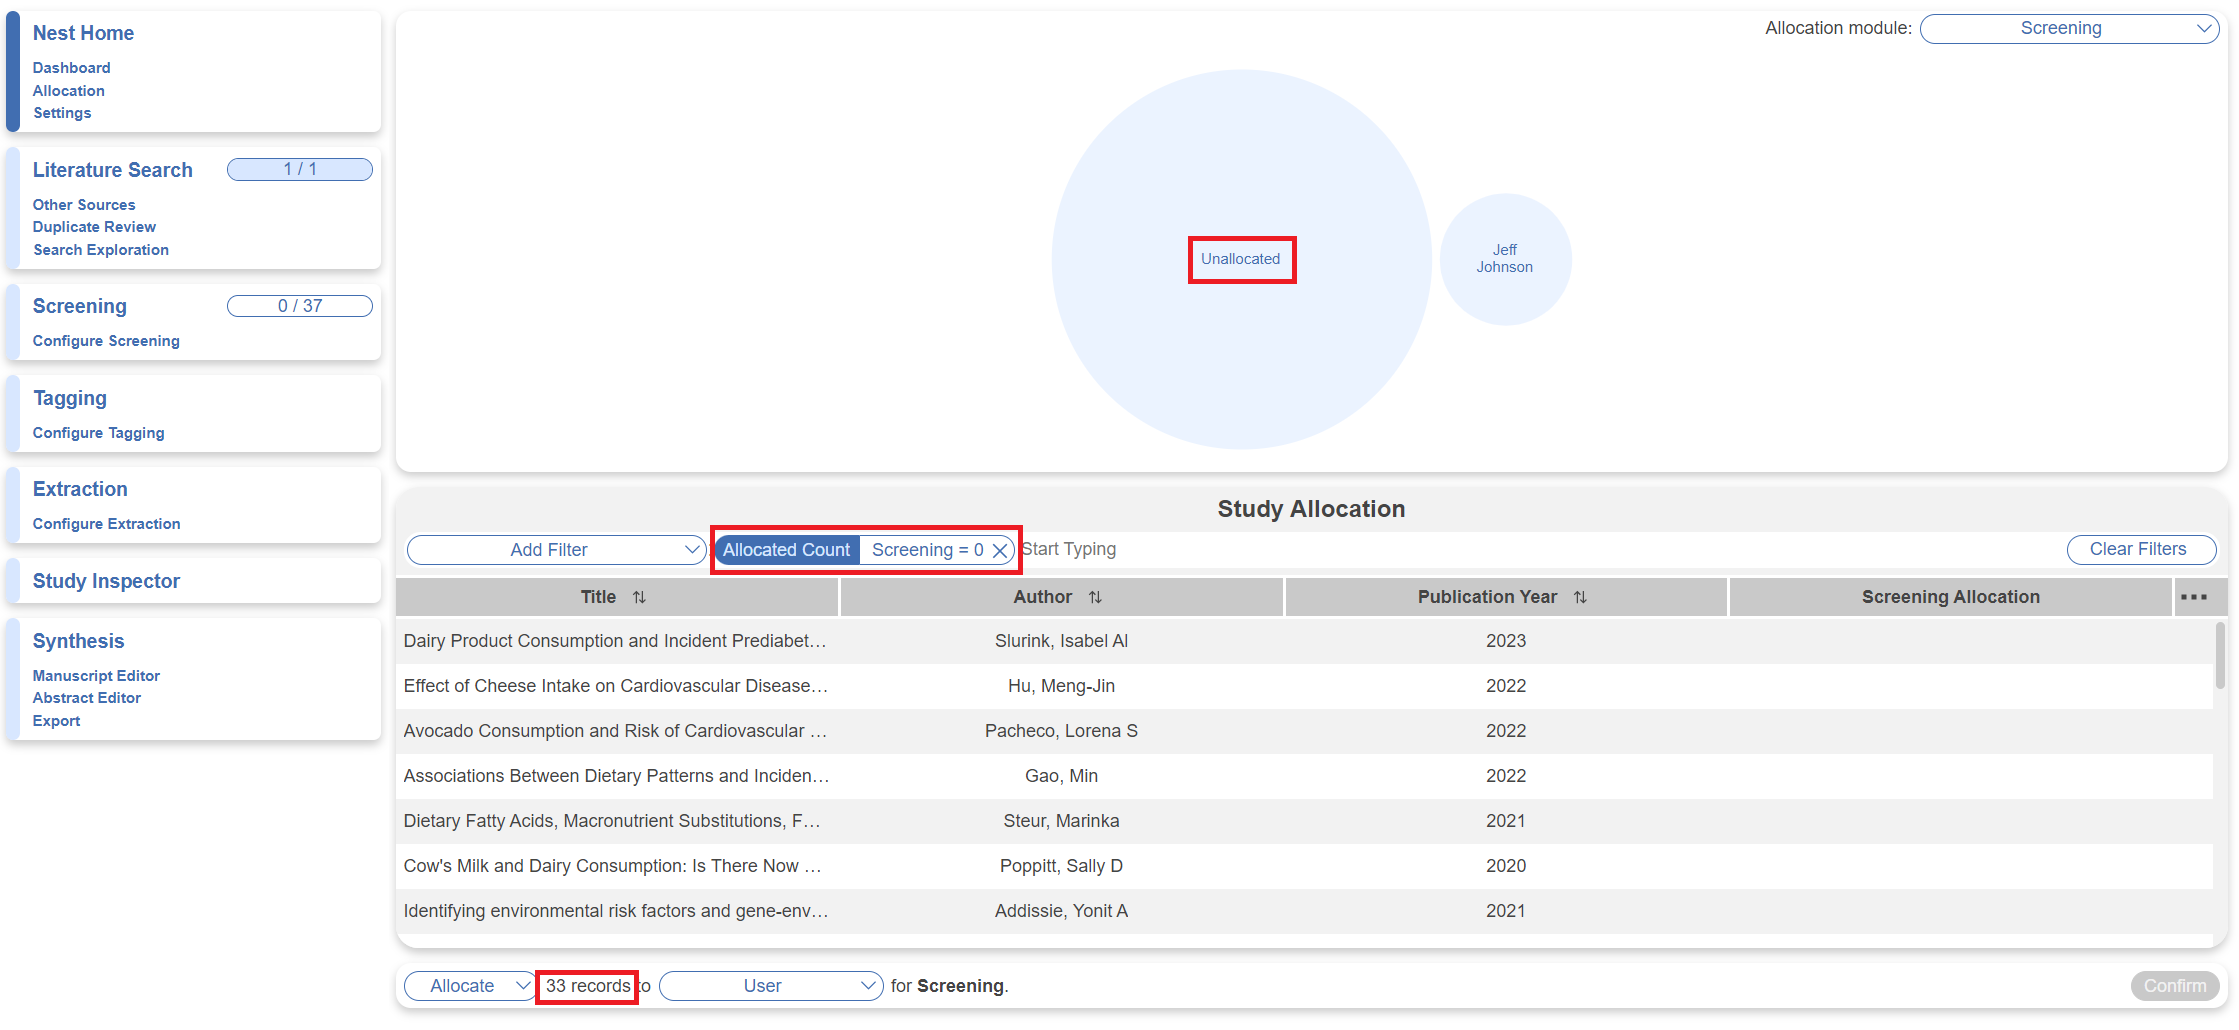
Once confirmed, the visual venn diagram will display names of users who have been allocated records with exact numbers when you hover over each venn, as well as unallocated records. It shows the overlap (if there is any) of assigned records between users. In this example, 4 records were allocated to Jeff Johnson, while 33 records remain unallocated.

Clicking on each venn will automatically add a filter to display a list of corresponding records below to allow ease of allocating records. For example, to quickly allocate the rest of the unallocated records, here we can click on the “Unallocated” venn and it will filter to the remaining 33 records.

Deallocate Records

In addition to allocating records, you can deallocate records from users. To do so, filter to the module and records of choice, click the “Allocate” dropdown, select “Deallocate,” select the user and click Confirm.

Note: Deallocating users from records does not remove their work performed/decisions that were made prior to deallocation.

Allocating the Same Records to Multiple Users in Single Modes

In the case you assign a record to multiple users but your nest is configured in single modes (i.e. Standard Screening, Standard Tagging, etc.), this does not mean it will be reviewed twice. It just means it will show up in each users' queue until one of them completes the work on the record, where it will be removed from the other users' queue.

Allocation Module Status

As you allocate records in each module, the allocation module status can be viewed in the dropdown:

  • No circle = 0 records have been allocated
  • Empty circle = Some records have been allocated, some are currently unallocated
  • Full circle = Everything is allocated

Tracking User Progress

While nest menu progress bars display overall nest progress, individual users can view their progress in the Navigation bars within each module. In the below example, the top bar displays progress on all studies in nest, while the navigation numbers displays individual users' progress within the specific module of the nest.

Allocation in Dual Modes

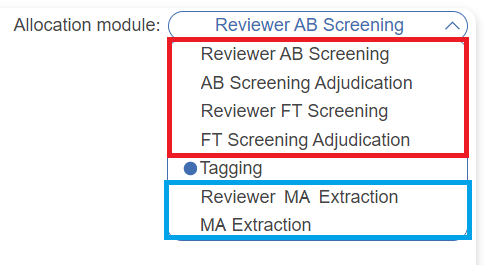
If your nest has dual modes configured for any of the modules, separate allocation is required for reviewer-level steps and adjudicator-level steps. In the example below, both Dual Two Pass Screening (allocation modules circled in red) and Dual Extraction are configured (allocation modules circled in blue).

It can get a little tricky so be sure to be intentional about allocating users to different steps.

Note: you cannot prematurely allocate users to steps when decisions affecting those steps haven't been made. For example, you cannot assign adjudication steps before reviewer-level work is complete.

Dual, Two-Pass Allocation Procedure

If your nest is configured for Dual, Two-pass Screening, the procedure for Allocation in order is:

  • Allocate Abstract (AB) reviewer-level Screening:
  1. Follow the steps above in the allocation module “Reviewer AB Screening”
  2. Then AB Screening at the reviewer-level must be done before allocating AB adjudication
  • Allocate Adjudication of Abstract Screening:
  1. Follow the steps above in the allocation module “AB Screening Adjudication”
  2. Then Abstract Adjudication must be done before allocating Full Text (FT) Screening
  • Allocate Full Text (FT) reviewer-level Screening:
  1. Follow the steps above in the allocation module “Reviewer FT Screening”
  2. Then FT Screening at the reviewer-level must be done before allocating FT adjudication
  • Allocate Adjudication of Full Text Screening:
  1. Follow the steps above in the allocation module “FT Screening Adjudication”
  2. Then FT Adjudication must be done before allocating steps in the next module: Tagging

Switching between modes

When you switch between Screening modes, all Allocation will be removed. This means that, when you switch Screening modes, you will need to re-allocate all studies in the queues for Screening steps (such as Abstract reviewer-level screening, Abstract adjudication, etc.). If you return to a previous Screening mode, the Allocation for that mode will be saved, but the most recent Allocation will not be available.

Allocation for any study that has proceeded to the Tagging stage or later will not be impacted by switching Screening modes.

Exporting Allocation

In Study Inspector, you can use the Allocation filters to view a list of records and users they were assigned to. To export this as a table, click the Download button in the top right corner.

wiki/autolit/admin/allocation.txt · Last modified: 2024/02/10 03:36 by kevinkallmes